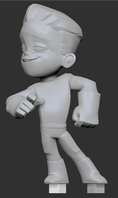
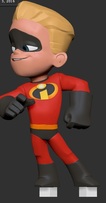
3D Portfolio:
Bamzee ArtStation:
click here
Tutorials:
see below
So, you want to Prepare a Zbrush model for a 3d print?
by Bamzee
How many tutorials are out there that try to teach you how to print your zbrush model / sculpture and you find yourself wanting to scream and punch someone in the face?
I feel your pain. I really do.
That is why I will teach you step by step how to get a perfect model ready for print out of Zbrush "Every Freakin Time"!
I will also teach you to ALWAYS know your scale and get your model perfect in Zbrush "Every Flippin Time"!
Yes. You can feel confident knowing that you came to the right place.
Maybe I'll even put together a video showing you...but for now... here we gooooooo!
Prepping a 3d model for print in Zbrush By Bamzee.
There are always some things that are often overlooked when prepping a 3d print. Here are a few things to think about.
- toy manufacturing is a tricky thing. It is re-engineering your model in a way so that it makes sense as a toy. Toy makers are always looking at things like the fingers should be thickened up. Pointy objects can become too much of a hazard. (point tests) Body parts help support other body parts. That's the kind of thinking you need when making a print.
- Make sure that there are no gaps. For instance, if your character has a very thin neck, and is wearing a backpack...nudge the backpack into
the neck to give it added support. Make sure things like the backpack straps are penetrating into the torso, so that there aren't any open gaps.
- If your character is 6 inches or so, you might consider scaling up some of your accessories such as a bowtie, a finger ring, necklace/ broach, belt buckle etc. These objects may look odd in Zbrush, but when they are a small toy on your desk, they actually look pretty cool.
ZBrush: How to scale a 3d object in ZBrush for printing
Ruler and a Base:
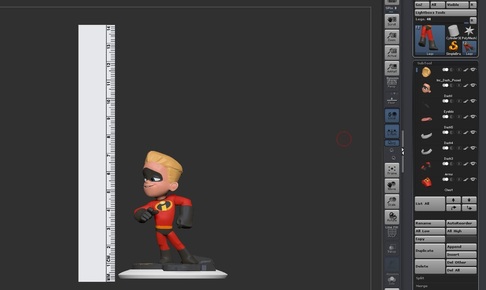
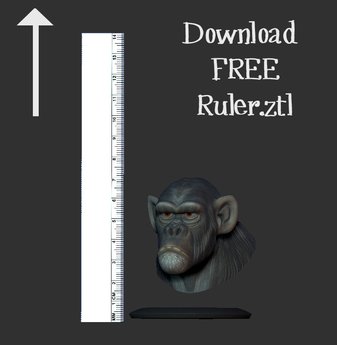
I included this very useful ruler and base in every Zbrush ztl. The ruler measures at exactly 140 millimeters. This ruler is how I always maintain the correct scale in the Zbrush scene. If you want your model to be bigger, just scale up the ruler. You never have to scale your subtools...only the ruler. Neat huh?
Ruler Rules:
- ruler must be the lowest point in your scene (bounding box around your subtools)
- ruler is always 140 mm
- DO NOT separate the disc and the ruler until your scale is final
- Only scale ruler/disc when setting scale. Ruler and disc are in one subtool so they are always scaled together.
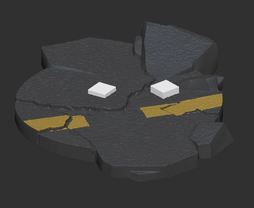
- The base (on top of the disc) can be scaled up or down sideways or however you want. It is it's own subtool.
| ruler_disc_ballen.rar | |
| File Size: | 8286 kb |
| File Type: | rar |
ZBrush: Setting Pegs in character feet / and character base
Pegs:
I personally like to add pegs to a characters feet.
I also duplicate the foot pegs and scale them slightly bigger, then subtract the pegs out of my base to leave holes for the foot pegs.
The reason that I keep the character separate from my base, (Not always, but most of the time)
is that when the character is printed, the supports attach to the platform instead of my base.
When both parts are done printing, I then glue the pieces together and they look real nice and clean. There are no support burs on the base to file or clean off.
How to prepare a Monochrome (grey) 3d Print in ZBrush:
by Bamzee
Monochrome Print:
Basically, a monochrome print means that you are printing a model that is WITHOUT color information.
Yup...just like black and white television (maybe more like grey)
What this really means is that you can have your awesome model in ZBrush in all its poly-paint glory, but as soon as you decimate your model, your color information is nuked and you now have a monochrome (WITHOUT COLOR) object.
*If Monochrome is what you want, and your model is completed to your satisfaction, you need to do a few basic things...
- set all subtools to highest divisions. (say like 4-5 subdivisions?)
- delete lowest subdivisions.
- Merge down each subtool (keep base separate. Keep Ruler / disc separate )
- Dynamesh at a reasonable level. (Likely just before it starts to lose resolution.)
- Your model still retains poly-paint color. (original UV's will be nuked)
- Open Decimation Master
- Select subtool desired
- Set the percentage of decimation to about 10 %
- Pre-process each part, or pre-process All
- Once it calculates, you can change the percentage over and over as long as you pre-process to view resolution
- View each percentage calculation and check your model for detail until you get desired resolution
- Once you hit decimate current, or decimate all...its a done deal. (you can still undo)
- Color info will be nuked.
- Save each step...for instance save dash12_merged.ztl, dash12_merged_dyna.ztl, dash12_merged_dyna_decimated.ztl
- I usually like each stl file to be at approx 15 - 40 megs.
Procedure:
Once the model/parts are dynameshed AND decimated to where you want it...( you should have NO poly-paint on the model)
- weld points
- close holes
Now go to Monochrome Export (see instructions below)
Monochrome Export Procedure:
- 3D Print exporter
- set 140 mm
- Advanced options
- click OFF move to origin
- click ON export in separate files (choose name files as subtools when it comes up later)
- click format to export...usually I click stl
That is the secret Monochrome export trick.
The scale will be PERFECT.
- 3D Print exporter
- set 140 mm
- Advanced options
- click OFF move to origin
- click ON export in separate files (choose name files as subtools when it comes up later)
- click format to export...usually I click stl
That is the secret Monochrome export trick.
The scale will be PERFECT.
How to prepare a "Color" 3d Print in ZBrush: by Bamzee
Color Print:
Basically, a color print means that you are printing a model that is WITH color information.
Yup...just like your in poly-paint heaven.
Basically, a color print means that you are printing a model that is WITH color information.
Yup...just like your in poly-paint heaven.
*If Color is what you want, and your model is completed to your satisfaction, you need to...
- set all subtools to highest divisions. (say like 4-5 subdivisions?)
- delete lowest subdivisions.
- Polypaint tab
- polypaint from texture for EACH subtool
- Merge down each subtool (keep base separate. Keep Ruler / disc separate )
- Dynamesh at a reasonable level. (Likely just before it starts to lose resolution.)
- Your model still retains poly-paint color. (original UV's will be nuked)
- DO NOT Decimate your model. Only dynamesh your model to the lowest point of losing detail. (you can't have too much info to process or your computer will barf and choke.)
- *******Remember....Only dynamesh your model...If you decimate your model, you will lose ALL the color info.
UV Procedure:
Once the model/parts are dynameshed to where you want it...and you still have poly-paint on the model....
-select each subtool
- weld points
- close holes
- open UV Master
- choose desired subtool
- turn OFF symmetry
- click unwrap (sometimes this takes forever. Go watch season 5 of "Suits" and it'll be ready when you come back...maybe)
- if it has UV's it will say so under the UV Map Tab (it will say delete UVs...that means that it has em...yay!)
- I usually keep map size at 2048
- Under the Texture Map Tab click on Create / New from Poly-paint
- in the texture window you will see your mapUV
- clone texture and it will appear in the left upper texture window
- repeat this process for each subtool
- Save file (you surely don't want to process those UVs again!)
Now go to Color Export (see instructions below)
Color Export Procedure: (most people would kill for this knowledge with the ruler! heh....no really.)
- 3D Print exporter
- set 140 mm
- Advanced options
- click OFF move to origin
- click ON export in separate files (choose name files as subtools when it comes up later)
- click format to export...click obj, make sure you click the D texture format you want....I usually go .bmp
That is the secret Color export trick.
The scale will be PERFECT.
Test Test Test!
How to test your 3d print parts:
Test out your scale by opening a new scene in ZBrush....
- place the star primitive
- open 3d export tab
- highlight star subtool
- click stl import
- choose stl (one by one)
- append star and highlight
- repeat til all files are in...
the scale should match perfectly.
(applause)
Test out your scale by opening a new scene in ZBrush....
- place the star primitive
- open 3d export tab
- highlight star subtool
- click stl import
- choose stl (one by one)
- append star and highlight
- repeat til all files are in...
the scale should match perfectly.
(applause)
